
LIFESTYLE
Gemmy Projection Light Not Working: Troubleshooting and Fixes
Check the plug fuse, remote, and focus before opening a Gemmy projection light not working. Leave the housing closed and read the 30-day warranty rules.

You plugged in a Gemmy projection light, aimed it at the garage, and the wall stayed dark. These lights show up in two common forms, a LightShow stake you push into the lawn and a Living Projection set that throws scenes onto an Airblown inflatable.
A Gemmy projection light not working is a check you can finish outside the housing. Start with the outlet, the fuse in the plug, and the remote, then fix aim and focus if the lamp is on but the picture is poor. This page sorts those cases, including a set that will not play scenes, and it ends with the warranty rules that decide whether a return is even open.
Which Gemmy Projection Light Do You Own?
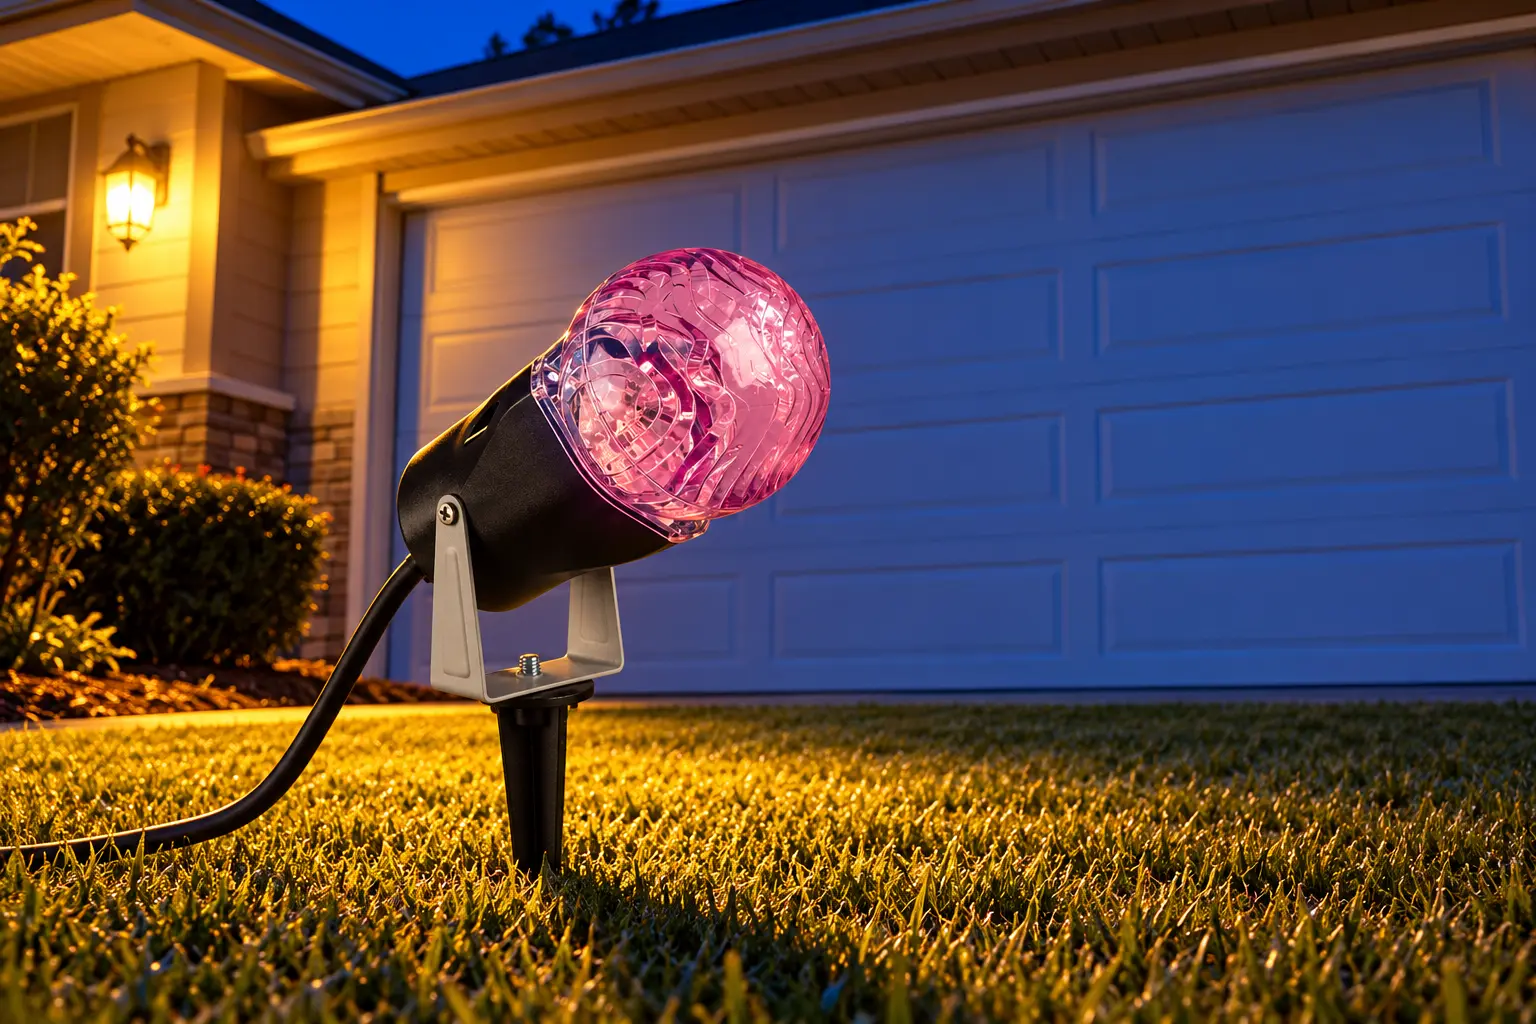
A LightShow stake is the smaller unit. The head is plastic, it sits on a ground stake or a short built-in tripod, and a cord runs straight to a wall outlet. Some heads have a focus dial. Some ship with a small remote, and some do not.
A SnowFlurry-style stake is the plain version of that idea. Its sheet says the projector turns on when the plug meets a live outlet and turns off when you unplug it. An outdoor timer is something you add yourself, and it is not in the box. A kaleidoscope-style stake is the one with a clear faceted dome on the same kind of lawn spike, and it also lives or dies by that outlet.
A Living Projection set is a different box. You get a projector, a weather-resistant case, a power adapter, a remote, and a convertible stake that can stand as a tripod while you line the picture up. Gemmy sells it with an Airblown inflatable, and the inflatable’s fan lead can plug into a USB port on the back of the projector. The item number on your tag or instruction sheet is what support will ask for, because these sets share the fuse rules and still differ on the remote.
Gemmy Projection Light Not Working at the Plug
Match the failure to the first check before you move the stake or shop for another projector. What you can see from the yard is enough to pick the row.
| What you see | First check |
|---|---|
| Stake head is completely dark | Test the outlet with a lamp, then open the fuse cover on the plug |
| Living Projection stays dark | Seat the adapter in the projector port, close the case, then press power on the remote |
| Light in the head, nothing on the wall | Peel packing film, aim the head, then turn the focus dial |
| Picture is dim, soft, or stretched | Cut nearby light, move closer, clean the lens, square the head to the wall |
| Picture is on, remote does nothing | Pull the plastic tab, step closer, then cut power and restore it |
| Bright flash, then a dim beam | Outlet and a new fuse of the same rating, then stop |
A lamp in the same outlet tells you whether the circuit is live. If you are on an extension cord, plug that lamp into the end of the cord, not only into the wall. Pull the Gemmy plug out by the plug body, not by the cord. One blade is wider than the other, and the plug fits a polarized outlet only one way, so do not force it and do not file a blade down.
How to Replace the Fuse in a Gemmy Plug
The user servicing steps on these LightShow sheets are all on the plug. A blown fuse means an overload or a short, and the sheet tells you to unplug the projector and any extra strings attached to it before you open the cover.
- Grasp the plug and pull it from the outlet. Do not unplug by pulling on the cord.
- Slide open the fuse access cover on top of the attachment plug, toward the blades.
- Remove the fuse or fuses carefully. Many of these plugs hold two.
- Replace a fuse only with the 5 Amp maximum, 125 volt fuse supplied with the product, same size and same type.
- Slide the fuse cover closed, plug into the outlet you already tested, and watch the head.
THE FUSE IS THE ONLY USER SERVICE
- Same rating: Use only a 5 Amp maximum, 125 volt fuse of the same size and type, the spare packed with the product.
- Leave the plug: Do not replace the attachment plug, and discard the product if that plug is damaged.
- Second blow: If the new fuse blows, a short may be present, and the sheet says to discard the product.
- Cover stays on: The shock caution says not to open the cover, because there are no user-serviceable parts inside.
That last line is the stop sign for a light that still looks wrong after a good outlet and a new fuse. Owners of older Fire and Ice Gemmy projectors describe a bright flash as the plug seats, then a dim beam for as long as it stays plugged in. If a fresh fuse of the same rating does not change that, the cover still stays on.
This product employs overload protection (fuse). A blown fuse indicates an overload or short-circuit situation. If the fuse blows, unplug the product from the outlet. Also unplug any additional strings or products that may be attached to the product.
Gemmy user servicing instructions, LightShow projection sheet
Ratings printed on the sheets are not one shared number. One projection sheet lists a small wattage at 120 volts, and other stake sheets list a higher draw, so a borrowed adapter has to match the label on your own unit. Do not cover the head with cloth or paper while it is on, and do not hang ornaments from the cord.
What to Do When the Gemmy Remote Does Nothing
A stake with no remote is not waiting for a button. If your set is the SnowFlurry kind, the only switch is the outlet, or a timer you added in front of it. A timer that has not reached its on time looks exactly like a dead projector.
Sets that do ship with a remote often hide a plastic tab on a new cell. Pull that tab before the first use. A remote that still has the tab never reaches the projector. When an older remote gets less sensitive, replace the cell, keep old and new cells from sharing the compartment, and do not mix battery types. Take the cell out if the remote will sit in a closet for a long stretch.
The filed Lightshow remote instructions put the working range at 20 feet (6 m). Step closer before you call the remote dead, and do not expect it to punch through the weather case from across the yard. On the three-button version the buttons are on, off, colors, and effect. The set can wake on red and shift to mixed colors after a few seconds, so a red opening is the warmup the sheet describes. Cycle the color button if you wanted red to stay.
If the signal hangs, turn the power off and bring it back, which is the reset the sheet gives you. After a power cut, that sheet keeps the last pattern, so you may already be on the look you chose. A faster string of taps is a separate problem, covered in the questions below.
Why Does a Gemmy Projection Picture Look Dim or Blurry?
A lit head with a weak picture is a placement problem far more than a parts problem. Daylight and porch lights wash the image out, which is why the stake sheets tell you to run the show in the dark. A dirty lens does the same thing. Extreme angles stretch the shapes, so swing the head until it faces the wall more squarely.
Stake manuals tell you to move the projector closer when the picture is faint, and they do not publish one distance that fits every stake. Gemmy’s own Living Projection setup video is more specific: place that projector about 10 to 15 feet from the inflatable, with the projector body vertical, and line the on-screen outline up with the inflatable before you commit the stake to the ground. A stake on a garage door wants the same habit even without a number on the sheet. Too far and the flakes go dim; a sharp sideways tilt and they smear.
How to Focus a Gemmy Projection Light
Stake projectors that include a dial use that dial as the focus. Turn it slowly while you watch the wall, not the lens. On a Living Projection set the focus and keystone knobs sit on top of the projector, so you open the weather case, turn the knobs, and slide the buckles shut again. The side knob on the convertible stake is for aim, and you retighten it once the picture lands where you want it.
CLEAR THE LENS BEFORE YOU CHASE FOCUS
- Power first: Unplug the projector before you touch the lens.
- Soft cloth: Wipe the lens with a soft dry cloth, and skip abrasive cleaners and solvents.
- Film and tags: Peel off plastic film, fasteners, and tags, because those are packing and the sheet says to throw them away.
A film you left on the lens looks like a failed lamp even when the LEDs are lit behind it. If the head also feels loose on the stake, push the stake deeper, or move it when the soil is too soft to hold. A leaning head throws the picture off the square you just focused.
Living Projection Scenes That Will Not Play
Living Projection fails in a different place than a stake light. The lamp can be fine while the adapter never reached the port, the case buckles pinched the cord, or the fan’s USB lead never seated. Gemmy’s setup film is the picture version of those checks, and it is worth watching once before you restake the inflatable.
Gemmy’s Living Projection setup page points you to that video and still lists written steps as on the way, so the video is the maker’s own sequence. Allow a calm setup in low light with little wind, the conditions the film asks for, and keep an outdoor extension cord within reach if the outlet is far from the inflatable.
- Lay out the projector, weather case, adapter, remote, and convertible stake, and start with the stake in tripod form so you can still slide the unit.
- Keep the projector body vertical, and set it in the 10 to 15 foot range from the Airblown.
- Slide both case buckles back and open the lid.
- Guide the adapter cable through the back of the case and into the projector power port. If the inflatable’s fan lead is not already in the USB port on the back of the projector, seat it there.
- Slide the buckles forward so the case is closed, then plug the adapter into a live outlet or the outdoor cord.
- Press power on the remote, choose initial setup, and move the projector or the inflatable until the outline matches the Airblown shape.
- Stake the inflatable, mark the projector spot, then collapse the tripod into the stake and set it in that mark.
- Open the case once more, turn the top knobs for focus and keystone, and close the buckles.
Playback on that remote is a menu choice, not a second power switch. You can run the selected scenes in order on a loop, run them in a random loop, or play the selection once. A set that showed scenes for a day or two and then would not enter setup still gets this cord-and-port pass first. On that same video, the Gemmy Industries account says any remote should work for any of these projectors, and it sends people who are still stuck to Gemmy customer service rather than to a teardown.
How to Store a Gemmy Projection Light
Unplug the light when you are done for the night, and pull the plug rather than the cord. These products are built for outdoor use, and the SnowFlurry care notes still say that a long soak in heavy rain, snow, or ice can hurt them, so bring the stake inside for a bad storm. Wipe the housing with a damp cloth only after it is unplugged, and let it dry before it goes into a bin.
Store it cool and dry, out of direct sun, ideally back in the carton with the spare fuse. A remote cell comes out for a long off-season so it cannot leak in the compartment. The original box also matters later, because a warranty claim asks for it. Leave the focus alone at pack-up time if you can mark where the stake stood, since that dial was set for one distance and one wall.
When Does the Gemmy Warranty Still Cover a Projection Light?
Call the store that sold the light before you call Gemmy. If the store cannot exchange it, Gemmy’s warranty page offers a 30-day limited warranty on most products to the original purchaser who bought from an authorized retailer or wholesaler. The page says Gemmy may repair the item or replace it with something of equal value to the original price, and only when the return rules are met.
- The purchase was within the last 30 days.
- The purchase was during the product’s intended season.
- You can show proof of purchase.
- The item is still in its original packaging.
The same page withholds that warranty from seasonal stores that sell all sales final, and from closeout, second-quality, and resold goods, including garage sales, online auctions, and sellers who did not buy from Gemmy. If your light came from one of those, the seller is the one who has to answer. Instruction sheets for these projectors print Gemmy Industries Corp. at 117 Wrangler Drive, Suite 100, Coppell, TX 75019, and the phone 1 (877) 250-9032. Have the item number and the receipt in hand before you start a claim, and do not ship the light anywhere until someone at the store or at Gemmy tells you to.
Frequently Asked Questions
Are Gemmy Projection Lights Built for Indoor Use?
Yes on the stake models whose sheet says the device is for indoor and outdoor use. Use the built-in tripod on a flat floor indoors, and save the ground stake for the yard. Point the beam at a wall rather than at anyone’s eyes, and keep the cord out of the walkway so nobody trips on it.
How Long Should You Wait Between Gemmy Remote Presses?
Wait 2 seconds after each press of the function button before you press it again. The remote sheet also says the light can take up to 2 seconds to start after you turn the set on. A faster series of taps can leave the receiver looking stuck, and the fix for a stuck signal is to turn the power off and back on, not to keep clicking.
Can Other Light Strings Share a Gemmy Projector Plug?
Only if you accept that the fuse is there for an overload. The servicing steps tell you to unplug any extra strings or products attached to the projector before you change a blown fuse. Do not hang ornaments on the cord, and do not drape cloth or paper over the head while it is running.
Why Does a Gemmy Projection Light Flash Bright and Then Go Dim?
Some owners see a bright flash the moment the plug seats, then a dim beam for as long as the unit stays plugged in. Test the outlet with a lamp and fit a new fuse of the same rating. If neither check changes the dim beam, stop there and talk to the retailer or Gemmy, because the printed caution says the cover is not yours to open.
Does a Gemmy Projection Stake Turn On Without a Remote?
Some stakes do. The SnowFlurry sheet says that model turns on when you plug it into a live outlet and turns off when you unplug it, and a remote is not part of that set. If you added your own outdoor timer, the light stays dark until the timer reaches an on period.
Mark the hole the stake came out of, or the tripod spot on the porch, before you pack the light. Next season that same distance and the same square aim are what make the picture sharp again, and you will not have to rediscover them in the dark.
Disclaimer: This article is an educational guide to checks printed for Gemmy projection lights, and it is informational only. It is not electrical repair advice, a warranty decision, or a substitute for the instruction sheet packed with your model. Have a qualified electrician look at any cord, plug, or outlet that is cracked, hot, or scorched before you use it again. Fuse sizes, power ratings, and warranty rules reflect the sources reviewed and can change with the model and the year you bought it.

Another IndiGo Radome Splits After a Normal Lucknow Landing

Apple Will Make Full Disk Access an Explicit Mac Grant

Chainalysis AI Traced the Bitget Hack in 10 Minutes

Yapily Sits Out Open Banking Deals After Turning a Profit

Google’s Gemini 4 Argon Goes to Cyber Defenders First

BMW’s Heated Seat Retreat Taught Automakers Which Fees Survive

Nashville Votes for a Dolly Parton Airport It Has Not Named

Tesla Burns AI Cash While SpaceX Sends the Invoices

Copilot’s Election Problem Shifted From Errors to Silence

John Ternus Debuts a $2,099 Foldable and Holds iPhone 18
-
 AUTO3 years ago
BMW’s Heated Seat Retreat Taught Automakers Which Fees Survive
-
 ENTERTAINMENT2 months ago
Nashville Votes for a Dolly Parton Airport It Has Not Named
-
 NEWS2 months ago
Tesla Burns AI Cash While SpaceX Sends the Invoices
-
 NEWS3 years ago
Copilot’s Election Problem Shifted From Errors to Silence
-
 NEWS2 months ago
John Ternus Debuts a $2,099 Foldable and Holds iPhone 18
-

 NEWS2 months ago
The Book on China’s Car Brain Still Stars Infineon
-

 TECHNOLOGY3 years ago
How to Find Saved Audio on Facebook?
-

 ENTERTAINMENT2 months ago
Dolly Parton Laid to Rest as the Public Funeral Began